
How to Control a Stepper Motor with an Arduino: A Step-by-Step Tutorial
Stepper motors are widely used in motion control systems that require precise positioning, repeatable movement, and reliable performance. From CNC machines and 3D printers to robotics and automation equipment, stepper motors remain a popular choice—especially when paired with Arduino.
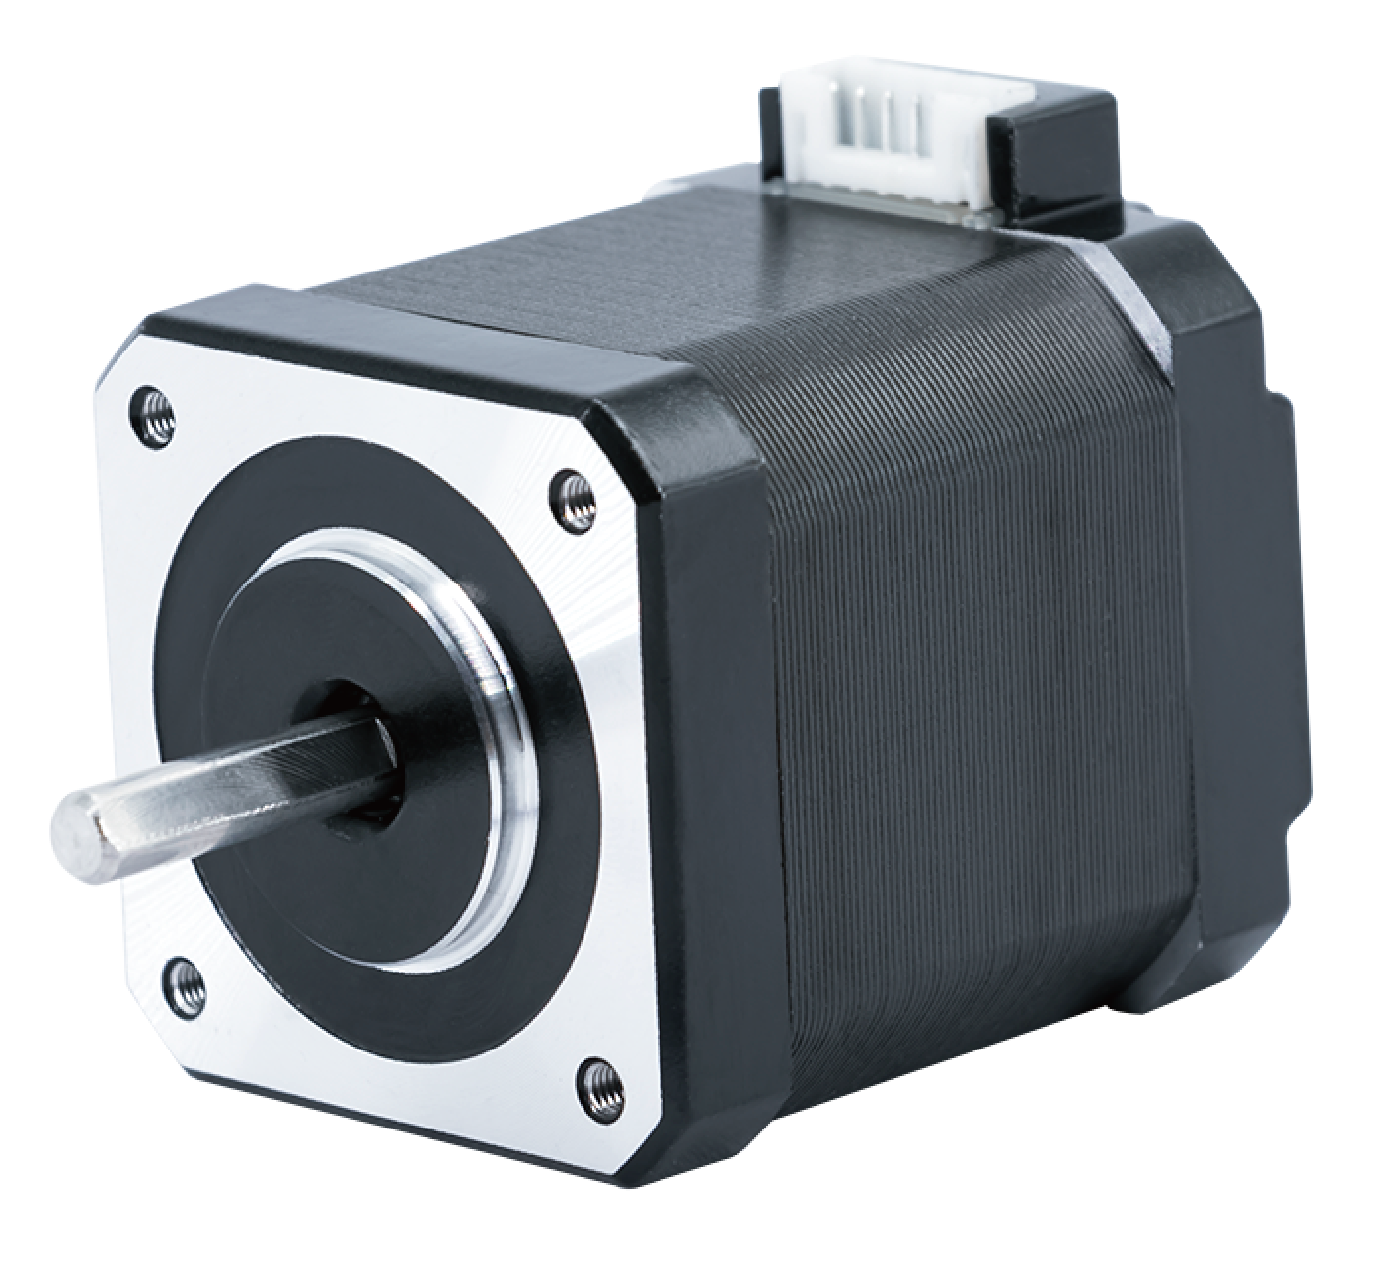
In this step-by-step tutorial, we will show you how to control a stepper motor with an Arduino, using an open-loop NEMA 17 (42mm) two-phase hybrid stepper motor as a practical example. This setup represents one of the most common and proven solutions for Arduino-based motion control projects.
1. Why Use a Stepper Motor with Arduino?
Arduino is widely adopted for prototyping and control tasks due to its simplicity, flexibility, and large ecosystem. Stepper motors are a natural match because they offer:
Precise position control without feedback
Simple pulse-and-direction control logic
Stable low-speed performance
Cost-effective implementation
Unlike DC motors, stepper motors rotate in discrete steps, allowing accurate angular positioning without encoders in most applications.
2. Choosing the Right Stepper Motor for Arduino Projects
For most Arduino applications, the NEMA 17 open-loop stepper motor is the preferred choice.
Why NEMA 17?
Standard 42 × 42 mm frame size
Widely available drivers and accessories
Balanced torque, size, and cost
Easy integration into mechanical designs
Open-Loop vs Closed-Loop
While closed-loop stepper motors offer position feedback, they also introduce higher cost and system complexity. For Arduino-based systems, open-loop stepper motors are sufficient in most cases, especially for prototyping, small automation systems, and educational projects.
In this tutorial, we use an industrial-grade NEMA 17 open-loop stepper motor (Model: SM1702).
3. Stepper Motor Specifications Used in This Tutorial
The following specifications represent a typical NEMA 17 two-phase hybrid stepper motor suitable for Arduino control:
| Parameter | Value |
|---|---|
| Motor Size | NEMA 17 (42 mm) |
| Motor Type | Two-phase hybrid, open-loop |
| Step Angle | 1.8° |
| Rated Current | 1.4 A / phase |
| Phase Resistance | 2.1 Ω ±10% |
| Phase Inductance | 3.4 mH ±20% |
| Holding Torque | 0.30 N·m |
| Duty Cycle | Continuous |
| Insulation Class | B |
| Operating Temperature | -20°C to +50°C |
| Service Life | > 5,000 hours |
These electrical characteristics make the motor compatible with commonly used Arduino stepper drivers such as A4988 and DRV8825.
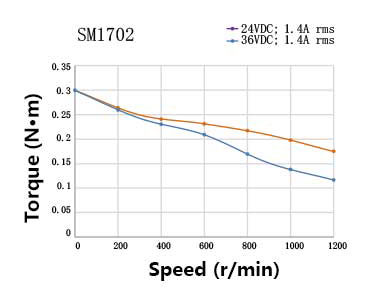
4. Understanding Torque-Speed Performance
Stepper motor performance depends heavily on supply voltage and driver selection.
For the SM1702 motor:
At 0 rpm, the holding torque is approximately 0.30 N·m
At higher speeds, torque decreases due to inductive effects
Increasing supply voltage from 24V to 36V significantly improves torque retention at higher speeds
This behavior highlights an important design principle:
Higher supply voltage helps maintain torque at higher rotational speeds, even when the rated current remains the same.
For applications requiring faster motion or heavier loads, this factor should be considered during system design.
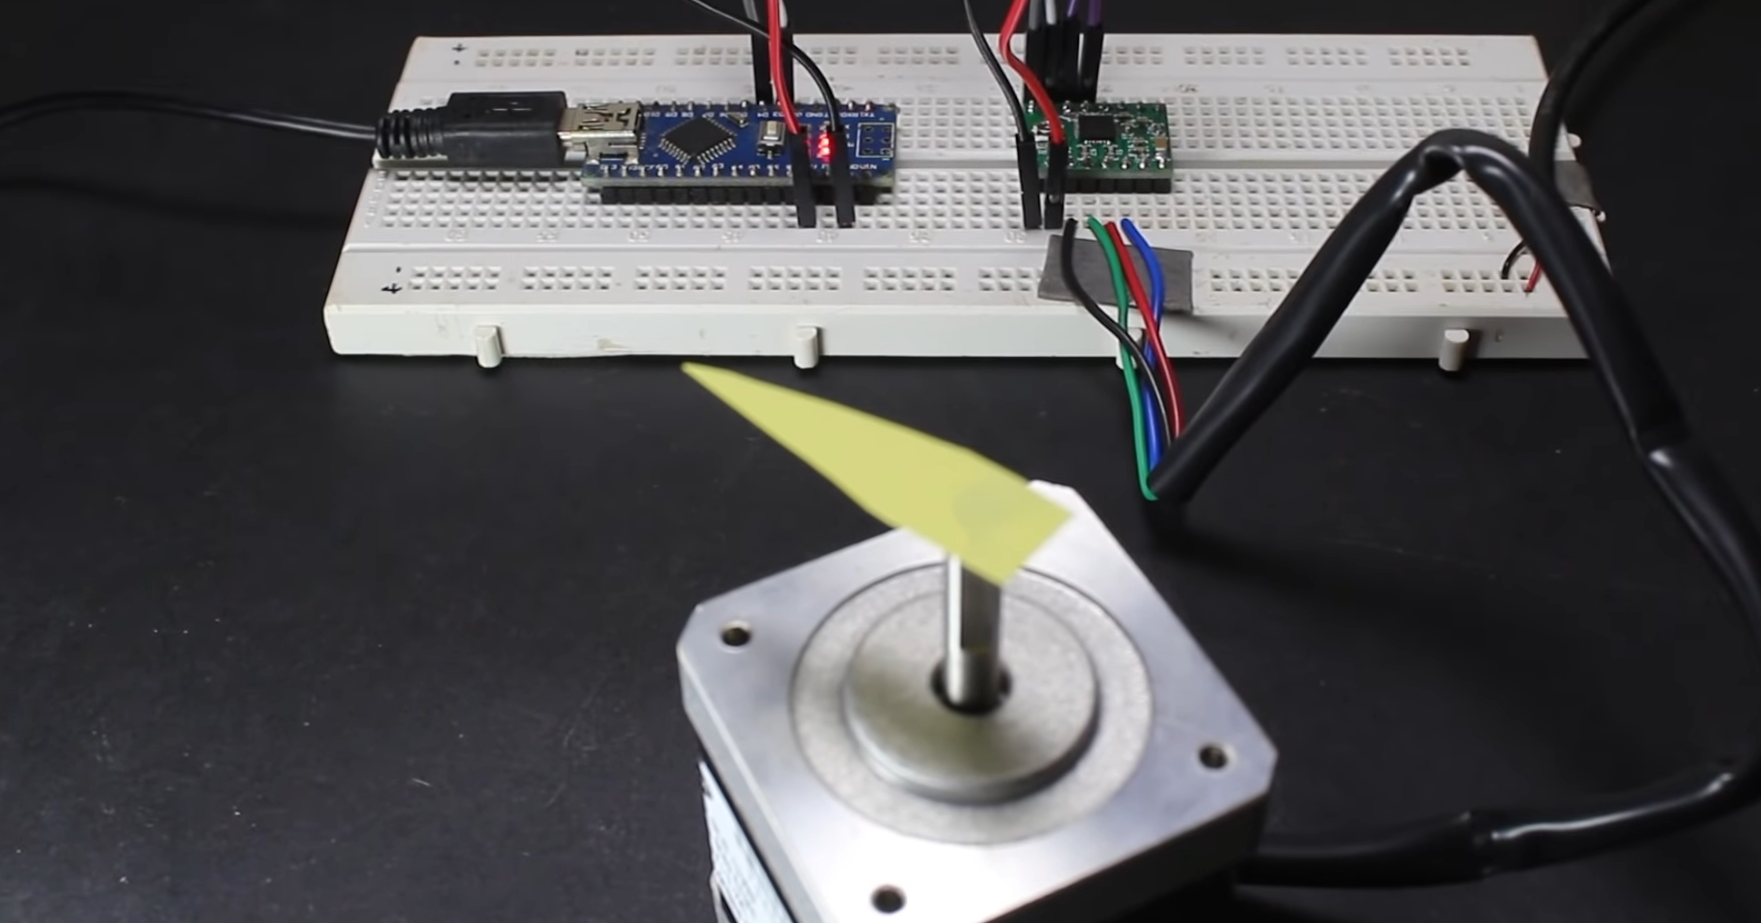
5. Required Hardware Components
To control a stepper motor with Arduino, you will need the following components:
Arduino Uno, Nano, or compatible board
NEMA 17 two-phase open-loop stepper motor (1.8°)
Stepper motor driver (A4988 or DRV8825)
External DC power supply (12V–36V recommended)
Breadboard or PCB
Jumper wires
Optional: heatsink for driver
Note: Do not power the stepper motor directly from the Arduino. Always use an external power supply for the motor.
6. Wiring the Stepper Motor to Arduino
A typical bipolar NEMA 17 stepper motor has 4 wires, corresponding to two motor phases (A and B).
Basic Wiring Overview (A4988 Example)
Motor Phase A → A1 / A2 on driver
Motor Phase B → B1 / B2 on driver
STEP pin → Arduino digital pin
DIR pin → Arduino digital pin
ENABLE (optional) → Arduino or GND
VMOT → External power supply (+)
GND → Common ground (Arduino + power supply)

Correct phase wiring is critical. If the motor vibrates but does not rotate, swap one coil pair.

7. Arduino Code Example
Below is a simple example using the built-in Stepper library. For smoother acceleration and higher performance, libraries such as AccelStepper are recommended.
#include <Stepper.h>

const int stepsPerRevolution = 200; // 1.8° per step
Stepper myStepper(stepsPerRevolution, 8, 9, 10, 11);

void setup() {
  myStepper.setSpeed(300); // RPM
}

void loop() {
  myStepper.step(stepsPerRevolution);
  delay(1000);
  myStepper.step(-stepsPerRevolution);
  delay(1000);
}
This code rotates the motor one full revolution clockwise and then counterclockwise.
8. Current Limiting and Driver Adjustment
Setting the correct current limit on the driver is essential.
For the SM1702 motor:
Rated current: 1.4 A per phase
Adjust the driver’s reference voltage (Vref) according to the driver datasheet to avoid overheating while maintaining sufficient torque.
9. Mechanical Integration
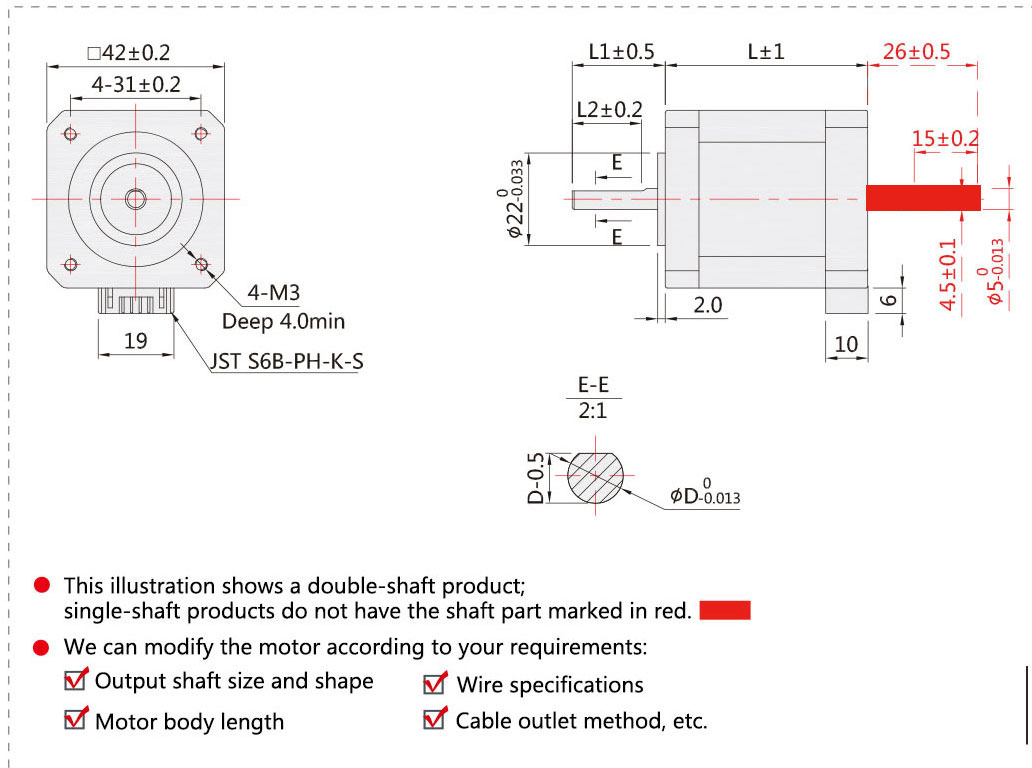
The motor follows standard NEMA 17 mounting dimensions, making it compatible with a wide range of brackets, couplings, and linear modules.
Typical applications include:
Linear actuators
CNC axes
Robotic joints
Conveyor positioning systems
Standard shaft dimensions allow easy coupling to lead screws, belts, or gearboxes.
10. Scaling Up: When to Use a Larger Motor
While NEMA 17 motors are ideal for light to medium loads, higher torque applications may require:
NEMA 23 stepper motors
Higher supply voltage
External drivers
Closed-loop systems
For CNC machines, packaging equipment, and industrial automation, upgrading the motor size or control architecture may be necessary.
11. Common Applications
Arduino-controlled NEMA 17 stepper motors are widely used in:
Desktop CNC machines
3D printers
Robotics platforms
Camera sliders
Medical and laboratory devices
Small automation equipment
Their reliability, precision, and ease of control make them a standard choice in motion systems.
12. Final Thoughts
Controlling a stepper motor with Arduino is straightforward when the right components are selected. An open-loop NEMA 17 two-phase hybrid stepper motor, such as the SM1702, offers an excellent balance of performance, simplicity, and cost.
By understanding motor specifications, torque-speed behavior, and proper driver configuration, you can build stable and reliable motion control systems suitable for both prototyping and real-world applications.
If you require detailed datasheets, drawings, or OEM customization options, selecting an industrial-grade stepper motor with consistent electrical and mechanical performance is critical for long-term success.